性能优化

思考:

  • 你在项目中是怎么优化内存的?
  • 优化你是从哪几方面着手?
  • 列表卡顿的原因可能有哪些?你平时是怎么优化的?
  • 遇到tableView卡顿嘛?会造成卡顿的原因大致有哪些?

卡顿

CPU和GPU

在屏幕成像的过程中,CPU和GPU起着至关重要的作用

  • CPU(Central Processing Unit,中央处理器)
    对象的创建和销毁、对象属性的调整、布局计算、文本的计算和排版、图片的格式转换和解码、图像的绘制(Core Graphics)

  • GPU(Graphics Processing Unit,图形处理器)
    纹理的渲染

在iOS中是双缓冲机制,有前帧缓存、后帧缓存。
性能优化01

屏幕成像原理

显示器上的所有图像都是一线一线的扫描上去的,无论是隔行扫描还是逐行扫描,显示器,都有2种同步参数——水平同步和垂直同步。

水平同步脉冲(Horizontal synchronization pulse, Hsync)加在两个扫描行之间。它是一个短小的脉冲,在一行扫描完成之后,它就会出现,指示着这一行扫描完成,同时它也指示着下一行将要开始。 水平同步脉冲出现后,会有一小段叫horizontal back porch的时间,这段时间里的像素信号是不会被显示出来,过了这一小段时间之后,电子枪就开始扫描新的一行,将要显示的内容扫描到显示器上。

垂直同步脉冲(Vertical synchronization, Vsync)是加在两帧之间。跟水平同步脉冲类似,但它指示着前一帧的结束,和新一帧的开始。 垂直同步脉冲是一个持续时间比较长的脉冲,可能持续一行或几行的扫描时间,但在这段时间内,没有像素信号出现。
性能优化02

卡顿产生的原因

红色箭头表示CPU处理过程,蓝色箭头表示GPU处理过程,箭头的长短代表处理时间的长短。按照60FPS的刷帧率,每隔 16ms 就会有一次 VSync 信号:
性能优化03

在图像渲染的过程中主要有三种情况(图中从左至右):
第一种情况:CPU和GPU处理完成后,正好有一次 VSync 信号,将刚刚处理好的帧数据渲染到屏幕上;
第二种情况:CPU和GPU处理完成后,因为用时较短,VSync 信号过了一会才到,将刚刚处理好的帧数据渲染到屏幕上;
第三种情况:CPU和GPU处理完成后,因为用时较长错过了一次 VSync 信号,这条被错过的 VSync 信号只能将之前处理好的帧数据再次渲染到屏幕上,而这一次处理好的帧数据就要等下一次 VSync 信号才能渲染到屏幕上;

第三种情况就是卡顿产生的原因。分析第三种情况可以看出,卡顿产生的主要原因是CPU、GPU处理时间的长短,那么解决卡顿的主要思路就是尽可能减少CPU、GPU资源消耗。

卡顿优化

CPU

  • 尽量用轻量级的对象
    比如用不到事件处理的地方,可以考虑使用 CALayer 取代 UIView;
    基本数据类型能用 int 的就不要用 NSNumber;

  • 不要频繁地调用 UIView 的相关属性,比如 frame、bounds、transform 等属性,尽量减少不必要的修改;

  • 尽量提前计算好布局,在有需要时一次性调整对应的属性,不要多次修改属性;
  • Autolayout 会比直接设置 frame 消耗更多的 CPU 资源;
  • 图片的 size 最好刚好跟 UIImageView 的 size 保持一致;(避免CPU对不同size的图片进行伸缩计算)
  • 控制一下线程的最大并发数量;
  • 尽量把耗时的操作放到子线程,如:文本处理(尺寸计算、绘制)、图片处理(解码、绘制);

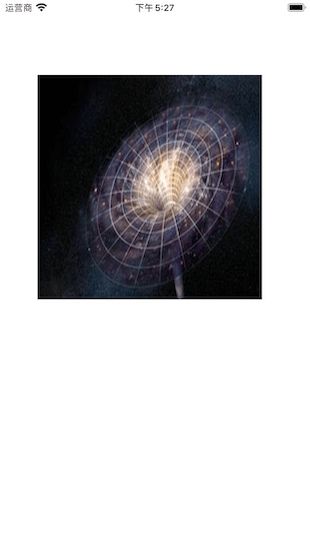
子线程绘制图片:
1
2
3
4
5
6
7
8
9
10
11
12
13
14
15
16
17
18
19
20
21
22
23
24
25
26
27
28
29
30
31
32
33
34
35
36
37
38
39
40
41
42
43
44
45
46
47
48
49
50
51
52
53
54
55
56
57
58
59
60
61
62
63
64
@implementation ViewController
- (void)viewDidLoad {
[super viewDidLoad];
UIImageView *imageView = [[UIImageView alloc] init];
imageView.frame = CGRectMake(50, 100, 300, 300);
[self initImageWithName:@"test" completion:^(UIImage *image) {
imageView.image = image;
}];
[self.view addSubview:imageView];
}
- (void)initImageWithName:(NSString *)imageName completion:(void(^)(UIImage *image))completion
{
dispatch_async(dispatch_get_global_queue(0, 0), ^{
// 获取网络图片
// CGImageRef cgImage = [UIImage imageWithData:[NSData dataWithContentsOfURL:[NSURL URLWithString:@"imageUrlString"]]].CGImage;
// 获取CGImage
CGImageRef cgImage = [UIImage imageNamed:imageName].CGImage;
// alphaInfo
CGImageAlphaInfo alphaInfo = CGImageGetAlphaInfo(cgImage) & kCGBitmapAlphaInfoMask;
BOOL hasAlpha = NO;
if (alphaInfo == kCGImageAlphaPremultipliedLast ||
alphaInfo == kCGImageAlphaPremultipliedFirst ||
alphaInfo == kCGImageAlphaLast ||
alphaInfo == kCGImageAlphaFirst) {
hasAlpha = YES;
}
// bitmapInfo
CGBitmapInfo bitmapInfo = kCGBitmapByteOrder32Host;
bitmapInfo |= hasAlpha ? kCGImageAlphaPremultipliedFirst : kCGImageAlphaNoneSkipFirst;
// size
size_t width = CGImageGetWidth(cgImage);
size_t height = CGImageGetHeight(cgImage);
// context
CGContextRef context = CGBitmapContextCreate(NULL, width, height, 8, 0, CGColorSpaceCreateDeviceRGB(), bitmapInfo);
// draw
CGContextDrawImage(context, CGRectMake(0, 0, width, height), cgImage);
// get CGImage
cgImage = CGBitmapContextCreateImage(context);
// into UIImage
UIImage *newImage = [UIImage imageWithCGImage:cgImage];
// release
CGContextRelease(context);
CGImageRelease(cgImage);
// back to the main thread
dispatch_async(dispatch_get_main_queue(), ^{
if (completion) {
completion(newImage);
}
});
});
}
@end

性能优化07

GPU

  • 尽量避免短时间内大量图片的显示,尽可能将多张图片合成一张进行显示;
  • GPU能处理的最大纹理尺寸是4096x4096,一旦超过这个尺寸,就会占用CPU资源进行处理,所以纹理尽量不要超过这个尺寸;
  • 尽量减少视图数量和层次;
  • 减少透明的视图(alpha<1),不透明的就设置 opaque 为 YES;
  • 尽量避免出现离屏渲染;

离屏渲染

  • 在 OpenGL 中,GPU 有2种渲染方式
    On-Screen Rendering:当前屏幕渲染,在当前用于显示的屏幕缓冲区进行渲染操作;
    Off-Screen Rendering:离屏渲染,在当前屏幕缓冲区以外新开辟一个缓冲区进行渲染操作;

  • 离屏渲染消耗性能的原因
    1.需要创建新的缓冲区;
    2.离屏渲染的整个过程,需要多次切换上下文环境,先是从当前屏幕(On-Screen)切换到离屏(Off-Screen);等到离屏渲染结束以后,将离屏缓冲区的渲染结果显示到屏幕上,又需要将上下文环境从离屏切换到当前屏幕;

  • 哪些操作会触发离屏渲染?
    1.光栅化,layer.shouldRasterize = YES
    2.遮罩,layer.mask
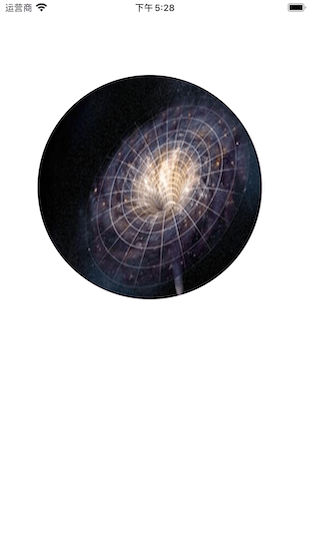
    3.圆角,同时设置 layer.masksToBounds = YESlayer.cornerRadius 大于0;(考虑通过 CoreGraphics 绘制裁剪圆角,或者叫美工提供圆角图片)
    4.阴影,layer.shadowXXX;(如果设置了 layer.shadowPath 就不会产生离屏渲染)

添加圆角:

1
2
3
4
5
6
7
8
9
10
11
12
13
14
15
16
17
18
19
20
21
22
23
24
25
26
27
28
29
30
31
32
33
34
35
36
37
38
39
40
41
42
43
44
45
46
47
48
49
50
51
52
53
54
55
56
@implementation ViewController
- (void)viewDidLoad {
[super viewDidLoad];
UIImageView *imageView = [[UIImageView alloc] init];
imageView.frame = CGRectMake(50, 100, 300, 300);
[self initImageWithName:@"test" completion:^(UIImage *image) {
imageView.image = image;
[self setCornerRadius:150 forImageView:imageView];
}];
// [self addShadowForImageView:imageView];
[self.view addSubview:imageView];
}
/**
使用 CAShapeLayer 与 UIBezierPath 配合画圆角
*/
- (void)addCornerRadius:(CGFloat)radius forImageView:(UIImageView *)imageView
{
// 开启图片上下文
// UIGraphicsBeginImageContext(imageView.bounds.size);
// 一般使用下面的方法
UIGraphicsBeginImageContextWithOptions(imageView.bounds.size, NO, 0);
// 绘制贝塞尔曲线
UIBezierPath *bezierPath = [UIBezierPath bezierPathWithRoundedRect:imageView.bounds cornerRadius:100];
// 按绘制的贝塞尔曲线剪切
[bezierPath addClip];
// 画图
[imageView drawRect:imageView.bounds];
// 获取上下文中的图片
imageView.image = UIGraphicsGetImageFromCurrentImageContext();
// 关闭图片上下文
UIGraphicsEndImageContext();
}
/**
使用 Core Graphics 画圆角
*/
- (void)setCornerRadius:(CGFloat)radius forImageView:(UIImageView *)imageView
{
// NO代表透明
UIGraphicsBeginImageContextWithOptions(imageView.bounds.size, NO, 0.0);
// 获得上下文
CGContextRef context = UIGraphicsGetCurrentContext();
// 添加一个圆
CGRect rect = CGRectMake(0, 0, imageView.bounds.size.width, imageView.bounds.size.height);
CGContextAddEllipseInRect(context, rect);
// 裁剪
CGContextClip(context);
// 将图片画上去
[imageView.image drawInRect:rect];
imageView.image = UIGraphicsGetImageFromCurrentImageContext();
// 关闭上下文
UIGraphicsEndImageContext();
}

性能优化08

卡顿检测

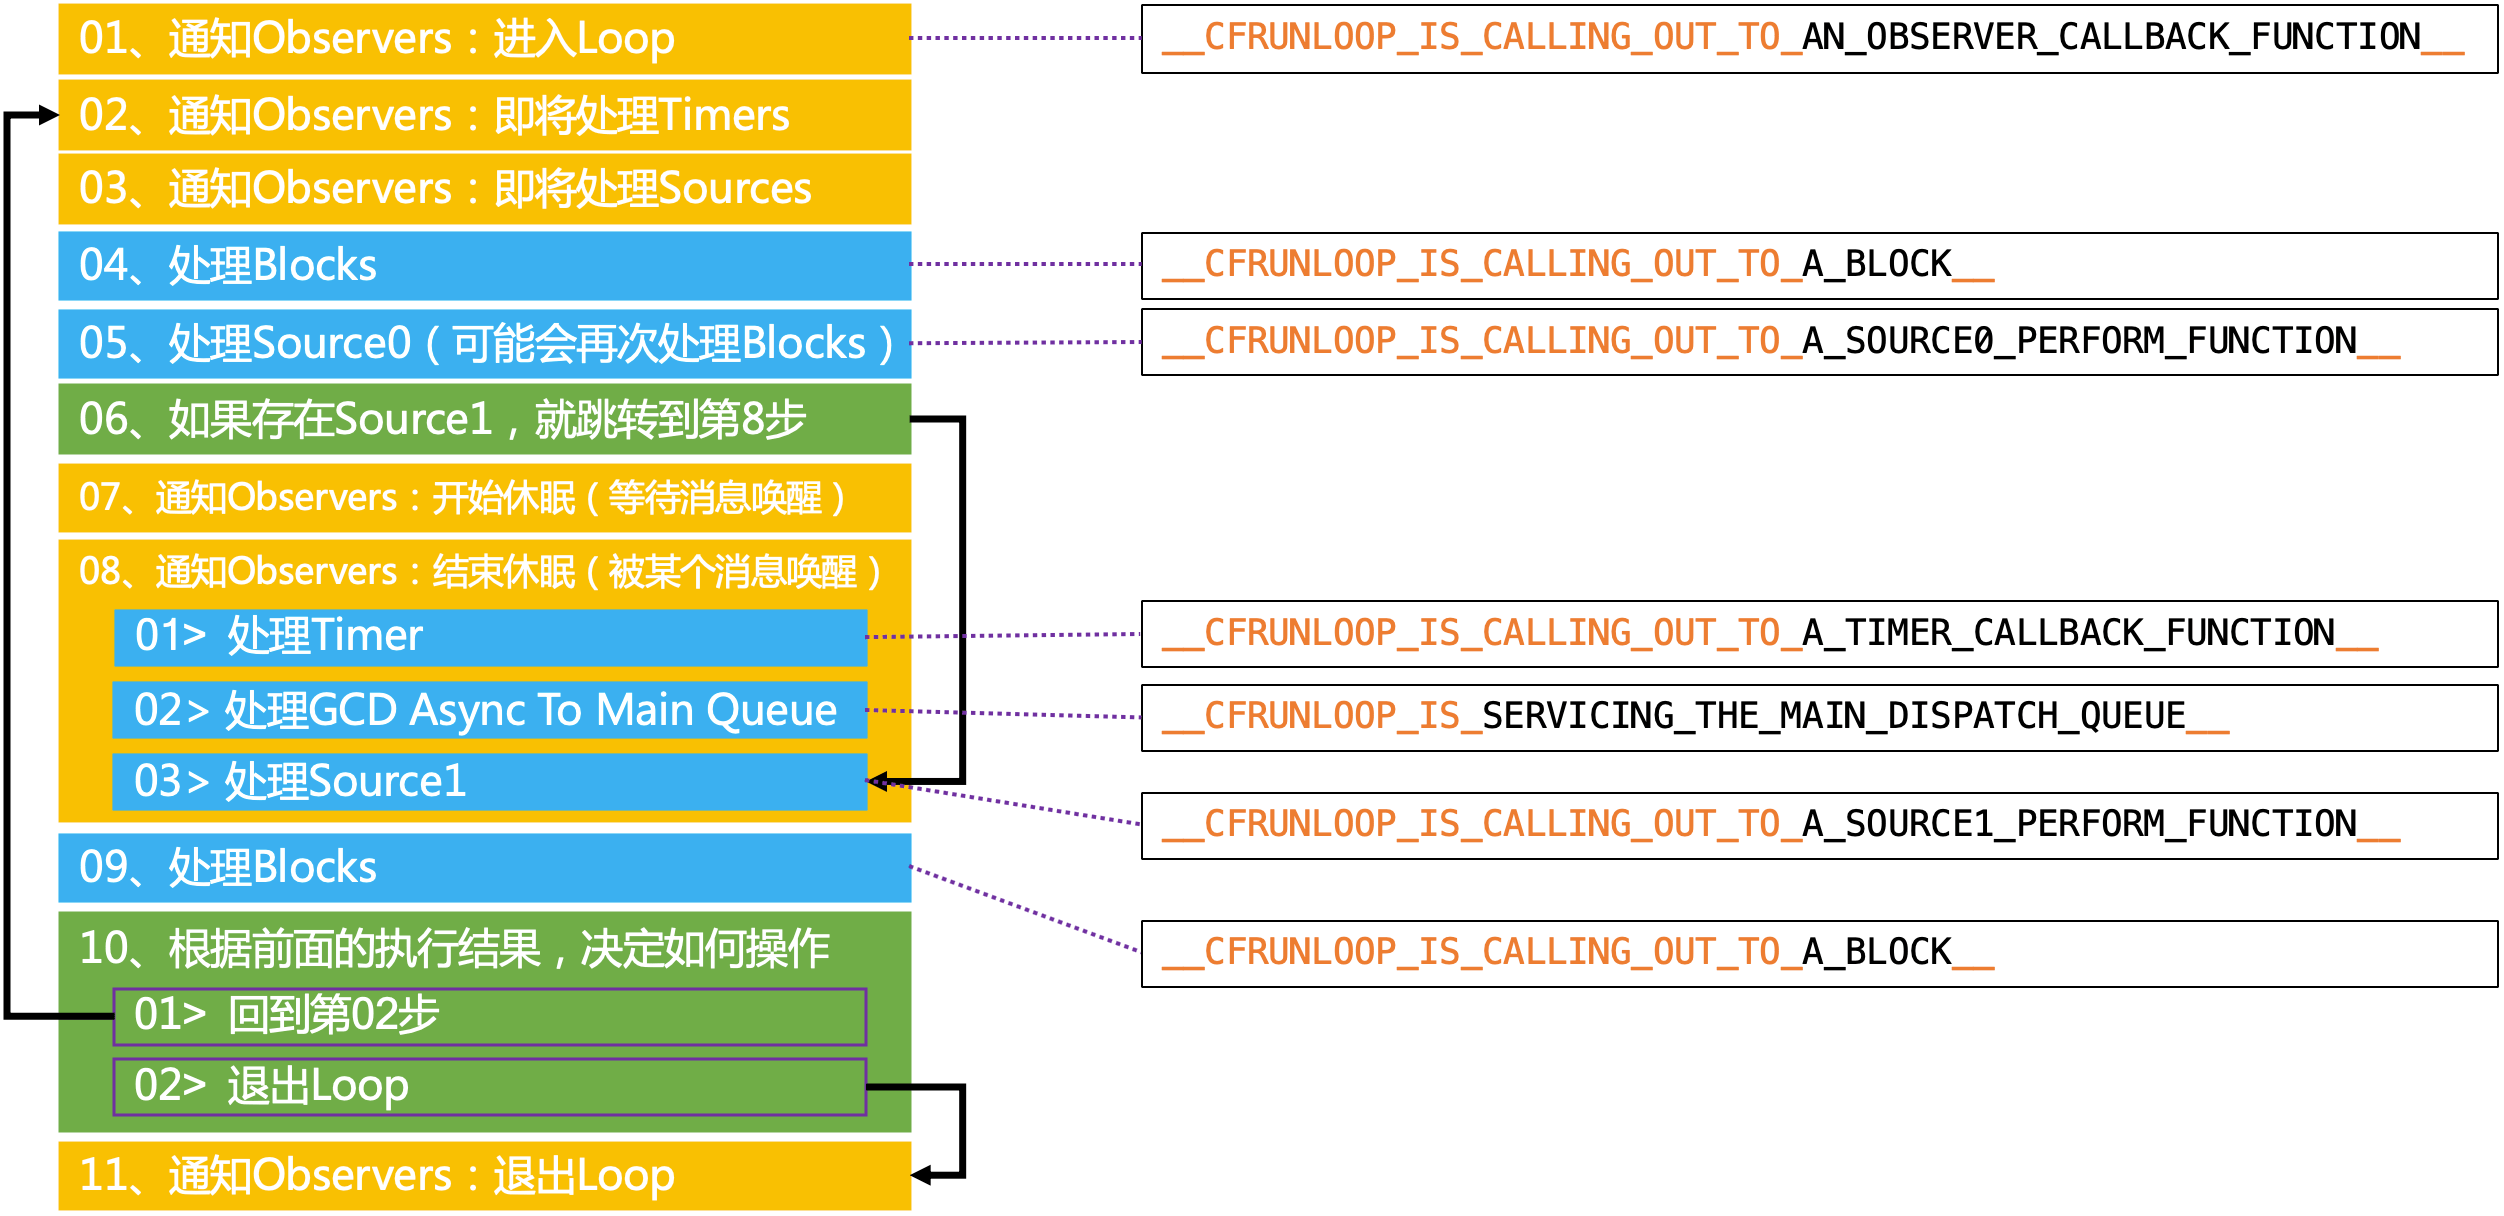
平时所说的“卡顿”主要是因为在主线程执行了比较耗时的操作,可以添加 Observer 到主线程 RunLoop 中,通过监听 RunLoop 状态切换的耗时,以达到监控卡顿的目的。
性能优化09

NSRunLoop 调用方法主要就是在 06 ~> 05 的循环,如果这段时间内耗时太长,就说明这段时间主线程出现卡顿。

LXDAppFluecyMonitor

使用 LXDAppFluecyMonitor 监测卡顿:

1
2
3
4
5
6
7
8
9
10
11
12
13
14
15
16
17
18
19
20
21
22
23
24
25
@interface ViewController ()<UITableViewDelegate, UITableViewDataSource>
@property (weak, nonatomic) IBOutlet UITableView *tableView;
@end
@implementation ViewController
- (void)viewDidLoad {
[super viewDidLoad];
[[LXDAppFluecyMonitor sharedMonitor] startMonitoring];
[self.tableView registerClass: [UITableViewCell class] forCellReuseIdentifier: @"cell"];
}
#pragma mark - UITableViewDataSource
- (NSInteger)tableView: (UITableView *)tableView numberOfRowsInSection: (NSInteger)section {
return 1000;
}
- (UITableViewCell *)tableView: (UITableView *)tableView cellForRowAtIndexPath: (NSIndexPath *)indexPath {
UITableViewCell * cell = [tableView dequeueReusableCellWithIdentifier: @"cell"];
cell.textLabel.text = [NSString stringWithFormat: @"%lu", indexPath.row];
if (indexPath.row > 0 && indexPath.row % 30 == 0) {
usleep(2000000);
}
return cell;
}
@end

打印结果:

1
2
3
4
5
6
7
8
9
10
11
12
13
14
15
16
17
18
19
20
21
22
23
24
25
26
27
28
2020-09-01 18:26:51.657686+0800 LXDAppFluecyMonitor[17096:323364] Backtrace of Thread 771:
======================================================================================
libsystem_kernel.dylib 0x7fff52208756 __semwait_signal + 10
libsystem_c.dylib 0x7fff52198510 usleep + 53
LXDAppFluecyMonitor 0x10876d58f -[ViewController tableView:cellForRowAtIndexPath:] + 351
UIKitCore 0x7fff4953de96 -[UITableView _createPreparedCellForGlobalRow:withIndexPath:willDisplay:] + 867
UIKitCore 0x7fff49507522 -[UITableView _updateVisibleCellsNow:] + 3010
UIKitCore 0x7fff4952724e -[UITableView layoutSubviews] + 194
UIKitCore 0x7fff4982d5f4 -[UIView(CALayerDelegate) layoutSublayersOfLayer:] + 2478
QuartzCore 0x7fff2b4e9260 -[CALayer layoutSublayers] + 255
QuartzCore 0x7fff2b4ef3eb _ZN2CA5Layer16layout_if_neededEPNS_11TransactionE + 523
QuartzCore 0x7fff2b4faa8a _ZN2CA5Layer28layout_and_display_if_neededEPNS_11TransactionE + 80
QuartzCore 0x7fff2b443a7c _ZN2CA7Context18commit_transactionEPNS_11TransactionEd + 324
QuartzCore 0x7fff2b477467 _ZN2CA11Transaction6commitEv + 649
QuartzCore 0x7fff2b3a4305 _ZN2CA7Display11DisplayLink14dispatch_itemsEyyy + 921
QuartzCore 0x7fff2b47b768 _ZL22display_timer_callbackP12__CFMachPortPvlS1_ + 299
CoreFoundation 0x7fff23d627dd __CFMachPortPerform + 157
CoreFoundation 0x7fff23da2449 __CFRUNLOOP_IS_CALLING_OUT_TO_A_SOURCE1_PERFORM_FUNCTION__ + 41
CoreFoundation 0x7fff23da1a48 __CFRunLoopDoSource1 + 472
CoreFoundation 0x7fff23d9c474 __CFRunLoopRun + 2228
CoreFoundation 0x7fff23d9b8a4 CFRunLoopRunSpecific + 404
GraphicsServices 0x7fff38c39bbe GSEventRunModal + 139
UIKitCore 0x7fff49325968 UIApplicationMain + 1605
LXDAppFluecyMonitor 0x10876ea40 main + 112
libdyld.dylib 0x7fff520ce1fd start + 1
======================================================================================

LXDAppFluecyMonitor 的核心代码:

1
2
3
4
5
6
7
8
9
10
11
12
13
14
15
16
17
18
19
20
21
22
23
24
25
26
27
28
29
30
31
32
33
34
35
36
37
38
39
40
41
42
43
44
45
46
47
48
49
50
51
52
53
54
55
56
57
58
59
60
61
62
63
64
65
66
67
68
69
70
71
72
73
74
75
76
77
78
static void lxdRunLoopObserverCallback(CFRunLoopObserverRef observer, CFRunLoopActivity activity, void * info) {
SHAREDMONITOR.currentActivity = activity;
dispatch_semaphore_signal(SHAREDMONITOR.semphore); // semphore加1
};
- (void)startMonitoring {
if (_isMonitoring) { return; }
_isMonitoring = YES;
// 注册RunLoop状态观察
CFRunLoopObserverContext context = {
0,
(__bridge void *)self,
NULL,
NULL
};
/** 创建RunLoop observer对象
分配内存
设置要关注的事件
标识在第一次进入run loop时执行还是每次进入run loop处理时均执行
设置优先级
设置回调函数
设置运行环境
*/
_observer = CFRunLoopObserverCreate(kCFAllocatorDefault, kCFRunLoopAllActivities, YES, 0, &lxdRunLoopObserverCallback, &context);
CFRunLoopAddObserver(CFRunLoopGetMain(), _observer, kCFRunLoopCommonModes);
dispatch_async(lxd_event_monitor_queue(), ^{
while (SHAREDMONITOR.isMonitoring) {
// kCFRunLoopBeforeWaiting - 即将进入休眠
if (SHAREDMONITOR.currentActivity == kCFRunLoopBeforeWaiting) {
__block BOOL timeOut = YES;
dispatch_async(dispatch_get_main_queue(), ^{
timeOut = NO;
dispatch_semaphore_signal(SHAREDMONITOR.eventSemphore); // eventSemphore加1
});
[NSThread sleepForTimeInterval: lxd_time_out_interval]; // 当前线程睡1s
if (timeOut) { // 1s后主线程还没有将timeOut修改为NO,默认主线程阻塞
[LXDBacktraceLogger lxd_logMain]; // 打印日志
}
dispatch_wait(SHAREDMONITOR.eventSemphore, DISPATCH_TIME_FOREVER); // eventSemphore减1
}
}
});
dispatch_async(lxd_fluecy_monitor_queue(), ^{
while (SHAREDMONITOR.isMonitoring) {
// semphore减1(等待200s,semphore == 0 或者“超时”会继续向下执行)
long waitTime = dispatch_semaphore_wait(self.semphore, dispatch_time(DISPATCH_TIME_NOW, lxd_wait_interval));
if (waitTime != LXD_SEMPHORE_SUCCESS) {
// 信号量超时了(runloop 的状态长时间没有发生变更,长期处于某一个状态下)
if (!SHAREDMONITOR.observer) { // 异常处理
SHAREDMONITOR.timeOut = 0;
[SHAREDMONITOR stopMonitoring];
continue;
}
// kCFRunLoopBeforeSources - 即将处理source
// kCFRunLoopAfterWaiting - 刚从休眠中唤醒
if (SHAREDMONITOR.currentActivity == kCFRunLoopBeforeSources || SHAREDMONITOR.currentActivity == kCFRunLoopAfterWaiting) {
if (++SHAREDMONITOR.timeOut < 5) {
continue; // timeOut标记信号量超时次数,不足5次则停止当次循环开启下一次循环
}
[LXDBacktraceLogger lxd_logMain]; // 打印日志
[NSThread sleepForTimeInterval: lxd_restore_interval]; // 当前线程睡1s
}
}
SHAREDMONITOR.timeOut = 0; // 将 timeOut 置为0
}
});
}
- (void)stopMonitoring {
if (!_isMonitoring) { return; }
_isMonitoring = NO;
CFRunLoopRemoveObserver(CFRunLoopGetMain(), _observer, kCFRunLoopCommonModes);
CFRelease(_observer);
_observer = nil;
}

耗电

耗电的主要来源

性能优化04

  • CPU处理,Processing
  • 网络,Networking
  • 定位,Location
  • 图像,Graphics

耗电优化

尽可能降低CPU、GPU功耗:

  • 少用定时器

  • 优化I/O操作
    1.尽量不要频繁写入小数据,最好批量一次性写入;
    2.读写大量重要数据时,考虑用 dispatch_io,其提供了基于GCD的异步操作文件 I/O 的API。用 dispatch_io 系统会优化磁盘访问;
    3.数据量比较大的,建议使用数据库(比如SQLite、CoreData);

  • 网络优化
    1.减少、压缩网络数据;
    2.如果多次请求的结果是相同的,尽量使用缓存;
    3.使用断点续传,否则网络不稳定时可能多次传输相同的内容;
    4.网络不可用时,不要尝试执行网络请求;
    5.让用户可以取消长时间运行或者速度很慢的网络操作,设置合适的超时时间;
    6.批量传输,比如,下载视频流时,不要传输很小的数据包,直接下载整个文件或者一大块一大块地下载。如果下载广告,一次性多下载一些,然后再慢慢展示。如果下载电子邮件,一次下载多封,不要一封一封地下载;

  • 定位优化
    1.如果只是需要快速确定用户位置,最好用 CLLocationManagerrequestLocation 方法。定位完成后,会自动让定位硬件断电;
    2.如果不是导航应用,尽量不要实时更新位置,定位完毕就关掉定位服务;
    3.尽量降低定位精度,比如尽量不要使用精度最高的 kCLLocationAccuracyBest
    4.需要后台定位时,尽量设置 pausesLocationUpdatesAutomatically 为YES,如果用户不太可能移动的时候系统会自动暂停位置更新;
    5.尽量不要使用 startMonitoringSignificantLocationChanges,优先考虑 startMonitoringForRegion:

  • 硬件检测优化
    1.用户移动、摇晃、倾斜设备时,会产生动作(motion)事件,这些事件由加速度计、陀螺仪、磁力计等硬件检测。在不需要检测的场合,应该及时关闭这些硬件;

启动

APP的启动

  • APP的启动可以分为2种
    冷启动(Cold Launch):从零开始启动APP;
    热启动(Warm Launch):APP已经在内存中,在后台存活着,再次点击图标启动APP;

  • APP启动时间的优化,主要是针对冷启动进行优化

  • 通过添加环境变量可以打印出APP的启动时间分析(Edit scheme -> Run -> Arguments)
    1.DYLD_PRINT_STATISTICS 设置为1;

    1
    2
    3
    4
    5
    6
    7
    8
    9
    Total pre-main time: 59.28 milliseconds (100.0%)
    dylib loading time: 52.30 milliseconds (88.2%)
    rebase/binding time: 126687488.9 seconds (190140774.5%)
    ObjC setup time: 7.95 milliseconds (13.4%)
    initializer time: 34.35 milliseconds (57.9%)
    slowest intializers :
    libSystem.B.dylib : 2.69 milliseconds (4.5%)
    libBacktraceRecording.dylib : 5.37 milliseconds (9.0%)
    libMainThreadChecker.dylib : 23.06 milliseconds (38.8%)

    2.如果需要更详细的信息,那就将 DYLD_PRINT_STATISTICS_DETAILS 设置为1;

    1
    2
    3
    4
    5
    6
    7
    8
    9
    10
    11
    12
    13
    14
    15
    16
    17
    18
    19
    20
    21
    22
    23
    24
    total time: 433.28 milliseconds (100.0%)
    total images loaded: 318 (311 from dyld shared cache)
    total segments mapped: 21, into 385 pages
    total images loading time: 299.19 milliseconds (69.0%)
    total load time in ObjC: 9.88 milliseconds (2.2%)
    total debugger pause time: 145.67 milliseconds (33.6%)
    total dtrace DOF registration time: 0.14 milliseconds (0.0%)
    total rebase fixups: 18,196
    total rebase fixups time: 0.32 milliseconds (0.0%)
    total binding fixups: 436,908
    total binding fixups time: 86.76 milliseconds (20.0%)
    total weak binding fixups time: 0.01 milliseconds (0.0%)
    total redo shared cached bindings time: 130.32 milliseconds (30.0%)
    total bindings lazily fixed up: 0 of 0
    total time in initializers and ObjC +load: 36.94 milliseconds (8.5%)
    libSystem.B.dylib : 2.94 milliseconds (0.6%)
    libBacktraceRecording.dylib : 6.00 milliseconds (1.3%)
    libobjc.A.dylib : 0.86 milliseconds (0.1%)
    CoreFoundation : 0.86 milliseconds (0.2%)
    libMainThreadChecker.dylib : 24.27 milliseconds (5.6%)
    total symbol trie searches: 1056780
    total symbol table binary searches: 0
    total images defining weak symbols: 32
    total images using weak symbols: 84
  • APP的冷启动可以概括为3大阶段:dyld、runtime 和 main

性能优化05

dyld

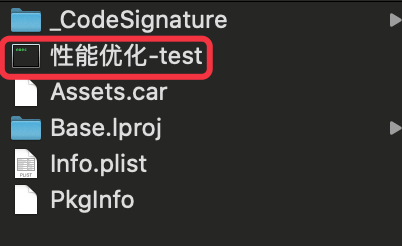
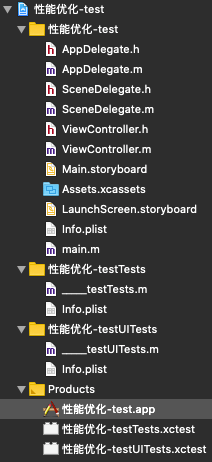
dyld(dynamic link editor),Apple的动态链接器,可以用来装载Mach-O文件(可执行文件、动态库等)。启动APP时,dyld 所做的事情有:
1.装载APP的可执行文件,同时会递归加载所有依赖的动态库;
2.当dyld把可执行文件、动态库都装载完毕后,会通知Runtime进行下一步的处理;
性能优化10
显示包内容:
性能优化11

runtime

启动APP时,runtime 所做的事情有:
1.调用 map_images 进行可执行文件内容的解析和处理;
2.在 load_images 中调用 call_load_methods,调用所有 Class 和 Category 的 +load 方法;
3.进行各种objc结构的初始化(注册Objc类 、初始化类对象等等);
4.调用C++静态初始化器和 __attribute__((constructor)) 修饰的函数;(被 __attribute__((constructor)) 修饰的函数在程序启动时,系统会自动调用该函数)

1
2
3
4
5
6
7
8
9
10
11
12
13
14
15
16
17
18
19
20
21
void _objc_init(void)
{
static bool initialized = false;
if (initialized) return;
initialized = true;
environ_init();
tls_init();
static_init();
runtime_init();
exception_init();
cache_init();
_imp_implementationWithBlock_init();
// 调用 map_images 和 load_images
_dyld_objc_notify_register(&map_images, load_images, unmap_image);
#if __OBJC2__
didCallDyldNotifyRegister = true;
#endif
}

上面就是 APP 启动时 dyld 和 runtime 全部的处理内容了,到此为止,可执行文件和动态库中所有的符号(Class,Protocol,Selector,IMP,…)都已经按格式成功加载到内存中,被 runtime 所管理。

main

1.APP 的启动由 dyld 主导,将可执行文件加载到内存,顺便加载所有依赖的动态库;
2.并由 runtime 负责加载成 objc 定义的结构;
3.所有初始化工作结束后,dyld 就会调用 main 函数;
4.接下来就是 UIApplicationMain 函数,AppDelegate 的 application:didFinishLaunchingWithOptions: 方法;

APP的启动优化

按照不同的阶段

  • dyld
    1.减少动态库、合并一些动态库(定期清理不必要的动态库);
    2.减少Objc类、分类的数量、减少Selector数量(定期清理不必要的类、分类);
    3.减少C++虚函数数量;
    4.Swift尽量使用struct;

  • runtime
    1.用 +initialize 方法和 dispatch_once 取代所有的 __attribute__((constructor))、C++静态构造器、ObjC的 +load

  • main
    1.在不影响用户体验的前提下,尽可能将一些操作延迟,不要全部都放在 application:didFinishLaunchingWithOptions: 方法中;
    2.按需加载

安装包瘦身

安装包(IPA)主要由可执行文件、资源组成:

资源

资源:图片、音频、视频等。

1.采取无损压缩;
2.去除没有用到的资源,工具 LSUnusedResources

可执行文件瘦身

  • 编译器优化:
    1.Strip Linked Product、Make Strings Read-Only、Symbols Hidden by Default设置为YES;
    2.去掉异常支持,Enable C++ ExceptionsEnable Objective-C Exceptions 设置为NO, Other C Flags 添加 -fno-exceptions
  • 利用 AppCode 检测未使用的代码:菜单栏 -> Code -> Inspect Code;
  • 编写 LLVM 插件检测出重复代码、未被调用的代码;
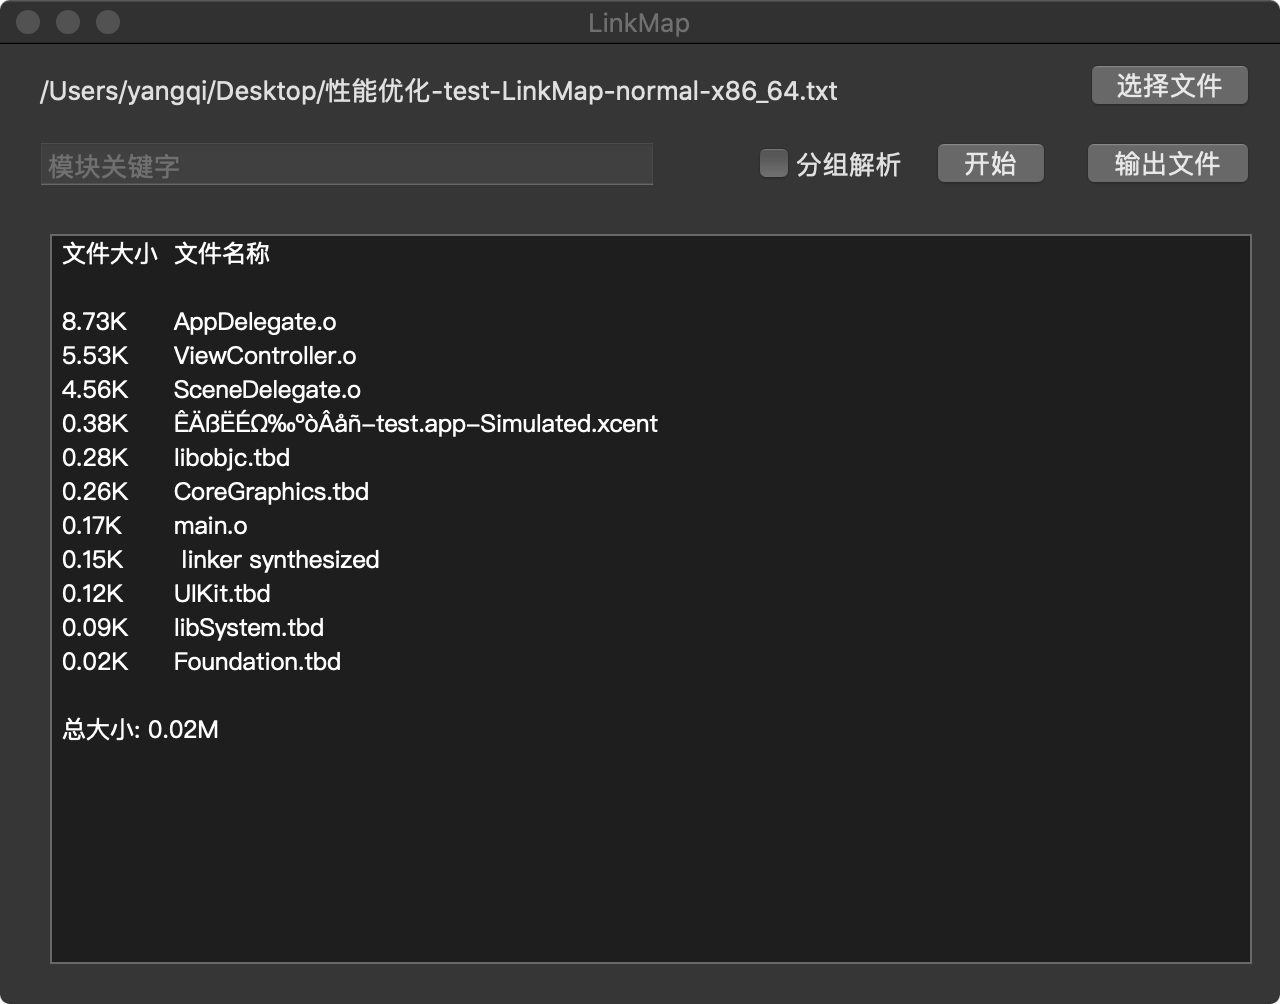
  • 生成 LinkMap 文件,可以查看可执行文件的具体组成
    性能优化06
    可借助第三方工具解析LinkMap文件,工具 LinkMap
    性能优化12

相关阅读

手机GPU
图形处理器
iOS应用千万级架构:性能优化与卡顿监控
CPU和GPU的设计区别
iOS 图像渲染原理
Matrix-iOS 卡顿监控